
Wood type: Walnut and Maple
Finish: Mineral Oil
Hardware: n/a
Finish: Mineral Oil
Hardware: n/a
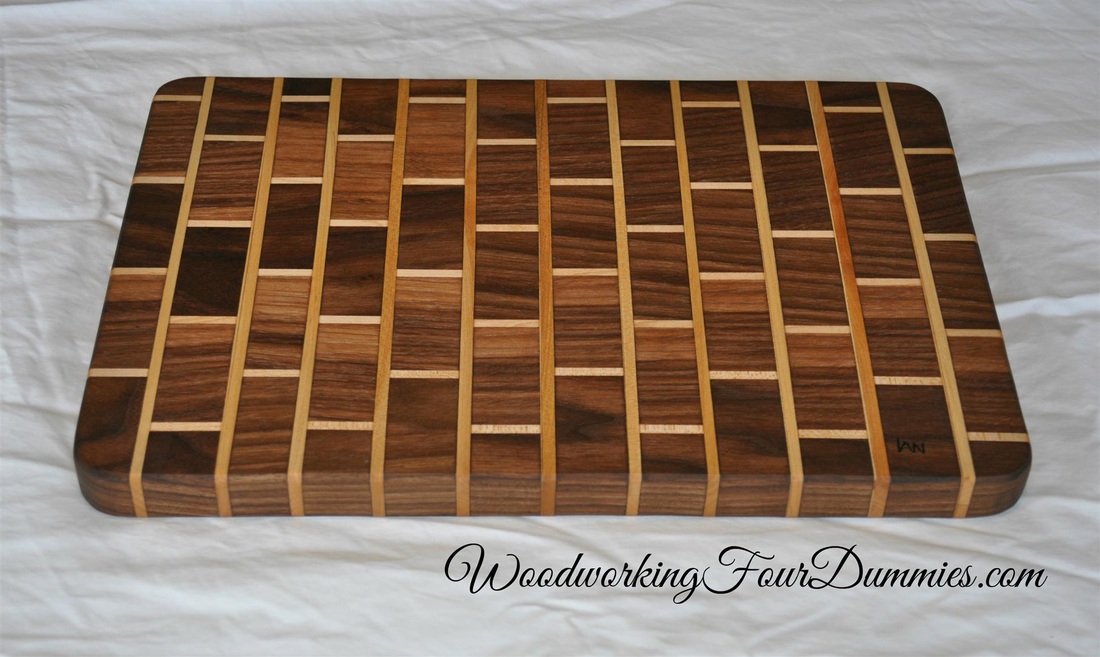
This was my first attempt at a cutting board, in retrospect I maybe should of made a simpler one. I made a few mistakes and it took longer than anticipated but I'm happy with the way it turned out. I followed these instructable steps and added some dado grooves with my router on the ends.
I won't go through all the steps since it would be redundant to the instructables link above. However, I'll share some of my mistakes and provide some of the tips I learnt along the way.
I won't go through all the steps since it would be redundant to the instructables link above. However, I'll share some of my mistakes and provide some of the tips I learnt along the way.
The picture below show my brick (Walnut) and mortar (maple) strips.
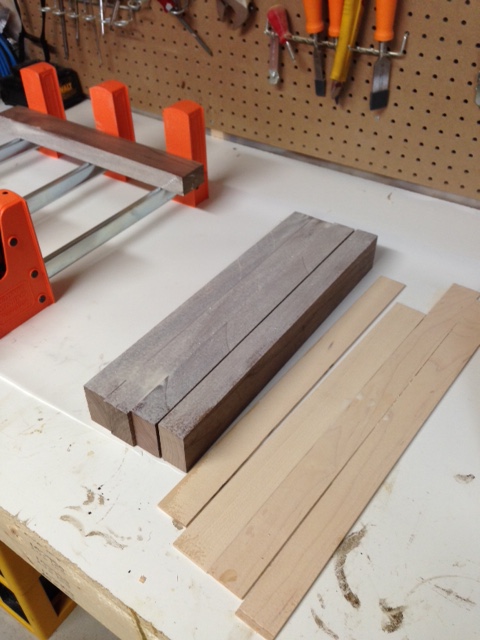
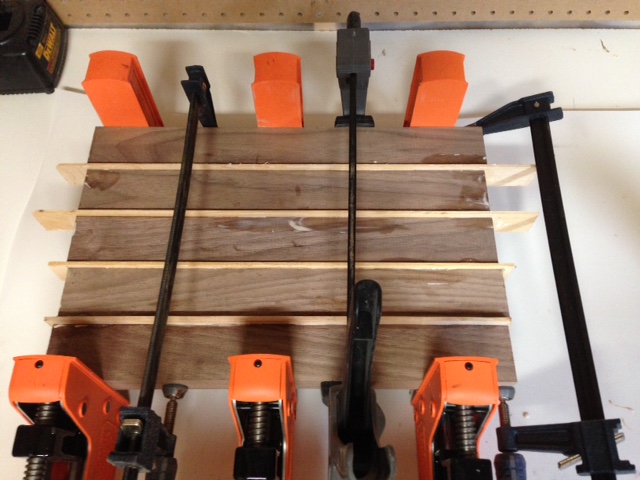
When I attempted by first glue up of the brick and mortar, there were some small gaps along the seams. This was mainly due to variance in thickness with the maple mortar pieces.
I don't have a band saw so I cut my pieces on my table saw. It was difficult to get all the pieces the same size since the saw blade kerf is quite thick. I cut the pieces a little thicker than desired and then ran them through the planer. However, I had a lot of snipe which caused the gaps in the glue up process. So did some searching on how to avoid snipe and started over.
I don't have a band saw so I cut my pieces on my table saw. It was difficult to get all the pieces the same size since the saw blade kerf is quite thick. I cut the pieces a little thicker than desired and then ran them through the planer. However, I had a lot of snipe which caused the gaps in the glue up process. So did some searching on how to avoid snipe and started over.
Once i redid the 'mortar' strips using the technique to avoid snipe, they pieces assembled quite well. Just cost me some extra time and money :(
When I finished all my cuts and glued everything together, the board was fairly flat. However, I did some searching on how to flatten boards. The ideal thing would be to run it through a drum sander but unfotunately I don't have one and they are quite expensive. I found several blogs and videos where people were using their router and a simple jig to flatten the board. So I decided to go this route and it worked out quite well. It did take a few passes and made board thinner but it it's very flat now.
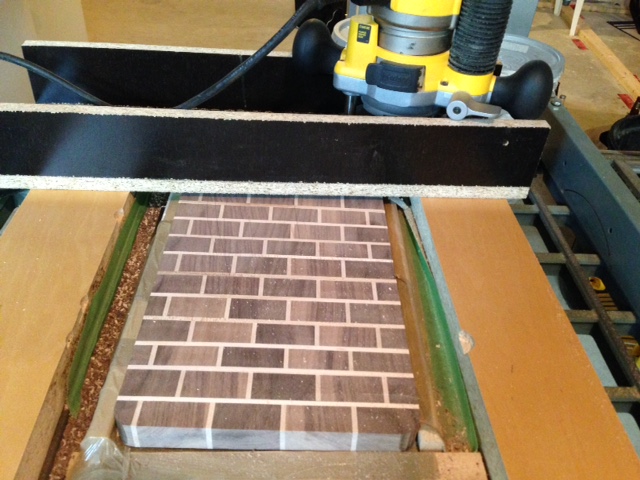
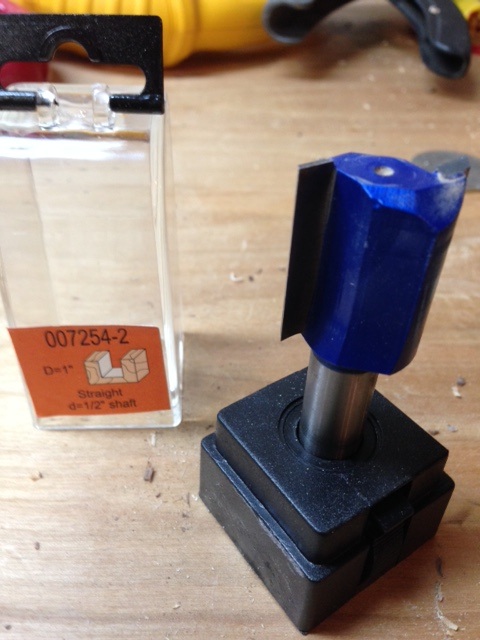
I didn't have the proper router bit, so I had to purchase a straight fluted bit. I bought a 1" bit, a bigger bit would speed up the process but they are more expensive. Below is a picture of the bit and another shot of the router jig.
|
|
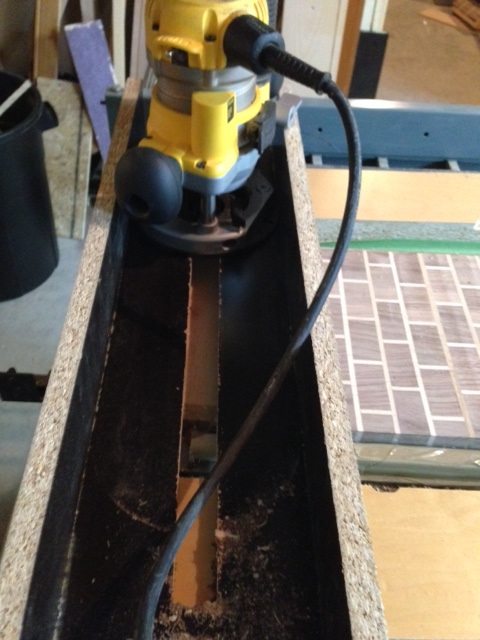
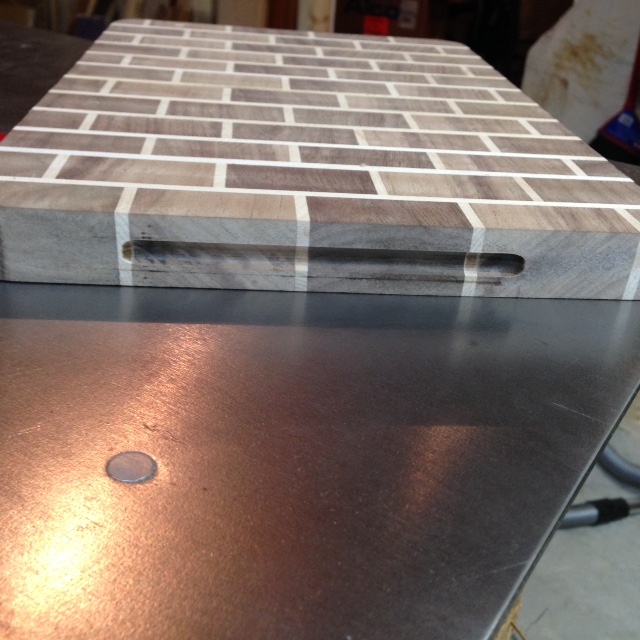
I decided to add a groove on the ends of the cutting board/serving tray so that it would be a bit easier to pickup.

|
|
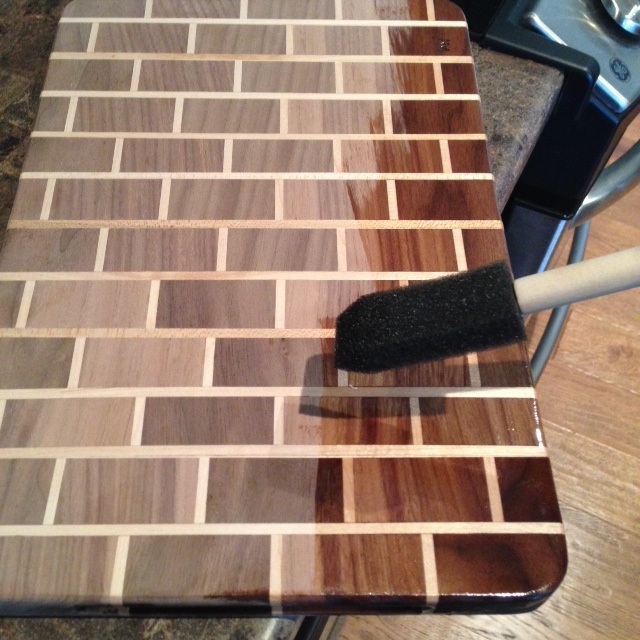
I used a mineral oil to finish the project. It's food safe and probably the most common fiish for cutting boards. As you can see below, it really makes the wood and grain 'pop'. I heated up the mineral oil and soaked the board in mineral oil over night (I did this twice - once for each side.
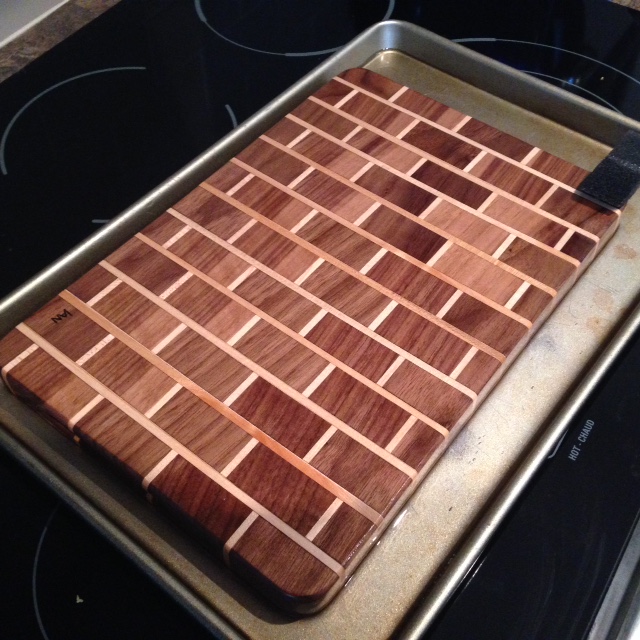
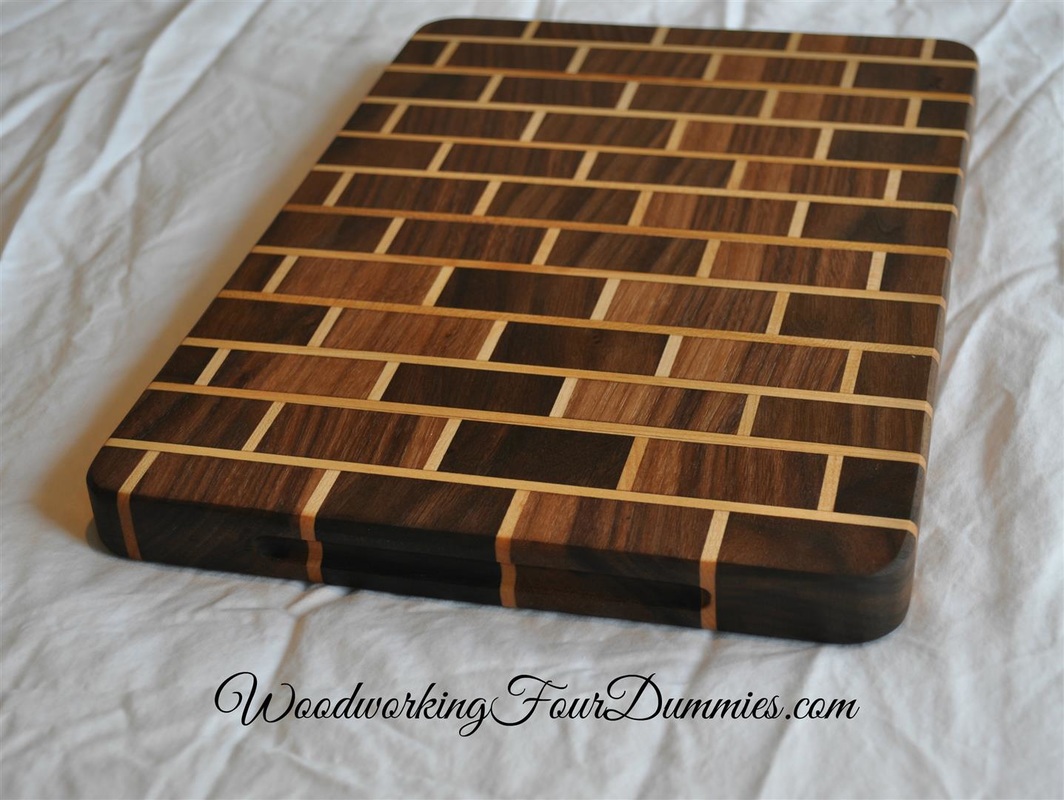
Project Complete!
 RSS Feed
